 |
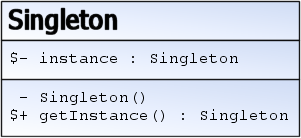
| UML class diagram of the singleton design pattern (Photo credit: Wikipedia) |
06-September-2017
Create a single-instance application. That was the objective I thought of lately on one small program I am creating. That is due to some database update needed. So no double-update or better yet, multiple updates, must happen.
Okay. It was actually simple, but here I will just outline the simple steps - again, for my own use when I need it in the future - and also for anybody else who might need to implement this same feature in their programs.
So how do you create a single-instance application? How to enforce a
singleton pattern?
It is very easy. Just look at the code snippet below. And this is using Mutex in the
Program section where your code execution starts.
internal static class Program {
private static Mutex mutex = new Mutex(true, "{a381c74c-c9a1-4716-beff-e8a08e964462}");
[STAThread]
private static void Main() {
if (mutex.WaitOne(TimeSpan.Zero, true)) {
Application.EnableVisualStyles();
Application.SetCompatibleTextRenderingDefault(false);
Application.Run(new MainForm());
mutex.ReleaseMutex();
}
else {
MessageBox.Show("Only one instance allowed.");
}
}
}
So that is the baseline requirement to satisfy a singleton pattern. And if you are wondering the seemingly cryptic string in the Mutex declaration, fret not. It is just a string that Mutex implementation requires, so it can be anything, like the name of your application, but it must be unique.
Alright, if you insist on using the same seemingly cryptic alphanumeric combination so it is unique, then add these 2 lines somewhere in the form load event, and just capture that value, and put it in the Mutex declaration. And comment those 2 lines right away as they are no longer needed.
var guiId = System.Guid.NewGuid();
MessageBox.Show("guiId");
Yes, that's how I got mine.
Now there is an additional feature that can be included, and not just simply throwing a
message box. The thing is, why not bring up the instance of the running application instead?
Well, that is possible.
Modify the Program section as per below code, which means disabling the message box and replacing it with some nifty Win32 function (
API). It is sending a message to all other running applications, but since it is unique only to this application, then it is understood only by this same application, so only this particular program will respond. Mind-boggling, isn't it?
Let's get done with it then!
internal static class Program {
private static Mutex mutex = new Mutex(true, "{a381c74c-c9a1-4716-beff-e8a08e964462}");
[STAThread]
private static void Main() {
if (mutex.WaitOne(TimeSpan.Zero, true)) {
Application.EnableVisualStyles();
Application.SetCompatibleTextRenderingDefault(false);
Application.Run(new MainForm());
mutex.ReleaseMutex();
}
else {
// MessageBox.Show("Only one instance allowed.");
// send our Win32 message to make the currently running instance
// jump on top of all the other windows
NativeMethods.PostMessage((IntPtr)NativeMethods.HWND_BROADCAST,
NativeMethods.WM_SHOWME, IntPtr.Zero, IntPtr.Zero);
}
}
}
As for
NativeMethods.cs, you need to create a
new class for that.
internal class NativeMethods {
public const int HWND_BROADCAST = 0xffff;
public static readonly int WM_SHOWME = RegisterWindowMessage("WM_SHOWME");
[DllImport("user32")]
public static extern bool PostMessage(IntPtr hwnd, int msg, IntPtr wparam, IntPtr lparam);
[DllImport("user32")]
public static extern int RegisterWindowMessage(string message);
}
Then, to complete the code, add two procedures after the Main Form's call to InitializeComponent.
public MainForm() {
InitializeComponent();
}
protected override void WndProc(ref Message m) {
if (m.Msg == NativeMethods.WM_SHOWME) {
ShowMe();
}
base.WndProc(ref m);
}
private void ShowMe() {
Show();
if (WindowState == FormWindowState.Minimized) { WindowState = FormWindowState.Normal; }
// get our current "TopMost" value (ours will always be false though)
var top = TopMost;
// make our form jump to the top of everything
TopMost = true;
// set it back to whatever it was
TopMost = top;
}
Now this is all that it takes to create a singleton implementation of a program. This is written in C#, so feel free to adapt this to other languages as you deem fit.
Sources
I am simply blogging on this singleton implementation, on how to create a single-instance application, but the source articles are
here and
here, thanks to the authors! Read on these 2 articles to get more explanations, and other suggestions, too.
Until then,
happy coding!


